Create and Export a Portfolio Report
00:03: Welcome to fuse.
00:05: Want to build a customised, professional portfolio report in minutes with Fuse?
00:09: Here's how.
00:11: From the ticket view screen, click the blue square button on the bottom right of
00:15: the screen to open action options.
00:18: Click Report Builder to open the configuration screen,
00:21: From here
00:22: you can 'Add' a Front Cover, table of contents and Cover Sheet sections.
00:27: Hover over the required section,
00:28: then click the (+) icon to add modules to start adding content and building your
00:33: report.
00:34: If you'd like to keep this panel visible, click the pin icon in the top right.
00:40: Click "Add" to include new elements or sections into your report structure.
00:45: When selecting linked files or linked forms, you'll be taken to an additional
00:49: screen
00:50: From here
00:50: you can choose the items to include in your report, then click Save to add them.
00:56: Click Show More to access additional content, including notes, audit history,
01:00: workflow information, and guidance notes.
01:05: Click Add to select a dashboard from the current project.
01:09: You will be taken to a screen where you can choose the dashboard you want to
01:12: include.
01:14: From here, select an available dashboard from the drop-down menu and click Save to
01:18: add it to the report.
01:20: From the drop-down menu, select the appropriate option to include dashboards from
01:24: other Projects, Groups, or Global Dashboards.You
01:27: will then be taken to a new screen where you can continue your selection.
01:32: From here, select the dashboard and the relevant project(s), then click Continue with
01:36: Project.
01:39: From this screen, you can apply filters or choose from different date
01:42: snapshots before adding the dashboard to the report.
01:46: Click Add to open a list of available forms.
01:49: Search for the required form, then click Select to view the tickets
01:54: Choose from the available tickets.
01:56: You can apply filters as needed, then select either a list view or an individual
02:01: ticket view.
02:02: Press Save to include in the report.
02:05: Click Add to open a list of all available files and choose the files
02:09: you want to include in the report.
02:12: You can search, apply filters, or select different views to customise the display.
02:17: Files can be included as a list or as converted PDF attachments. then press Add File
02:23: to include in the report.
02:25: Select Add to include a Cover Sheet, creating separate sections within your report
02:30: and allowing you to customise the text, styling, and images for each section.
02:35: Complete the title and subject fields,
02:37: choose a cover page layout, and then press Save to continue.
02:43: Click Generate to create a preview of the PDF.
02:47: Please allow a moment for larger reports to load.
02:50: You can download your report or attach the PDF copy to the main ticket.
02:55: Once you close the previous screen, you can save this setup as a template to quickly
02:59: reuse the same report configuration next time.
03:02: That's how easy it is to build professional business plan reports in Fuse.Thanks
03:06: for watching.
Use the Portfolio Report Builder to compile dashboards, forms and files. Enhance your report by adding front cover, back cover or section covers then automatically update a table of contents.
- Build a template with a front cover sheet, create sections and add a table of contents
- Pull through any linked forms or linked files
- Add dashboards from projects or groups across your portfolio
- Include global dashboards
- Attach any other file or form
- Add supporting information such as audit, notes, workflow and guidance notes
- Conclude with a back cover sheet and add any appendices using a section page
Steps to follow:
1. On the ticket view screen, click the blue square button on the bottom right of the screen to open action options.
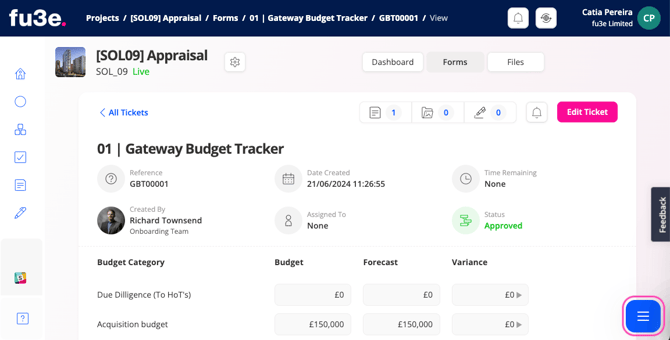
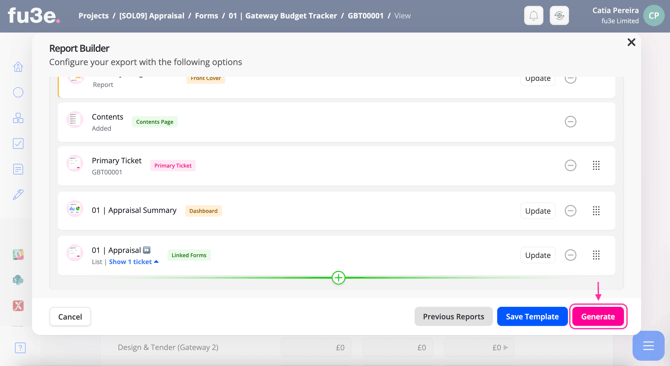
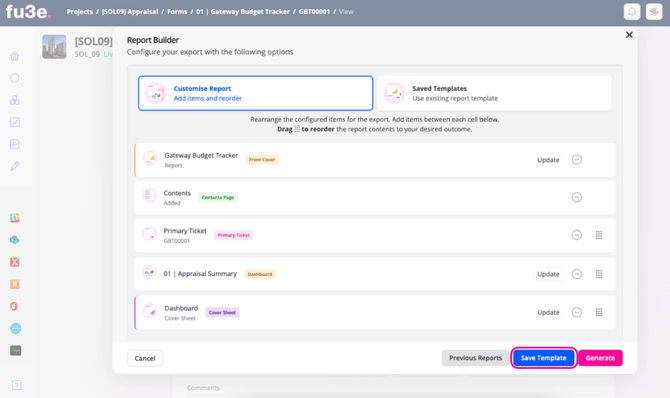
2. Click Report Builder to open the configuration screen, where you can ‘Add’ a Front Cover, table of contents and Cover Sheet sections.

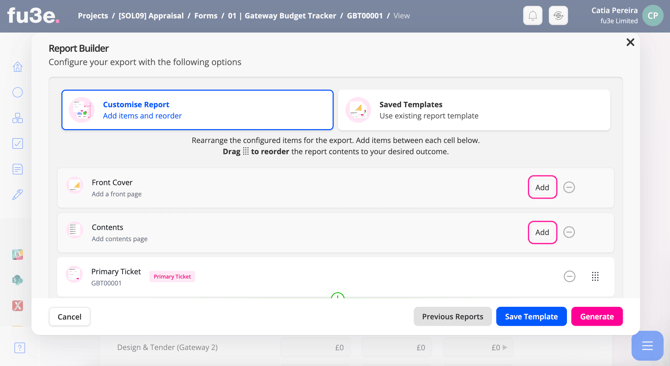
3. On hover, click the plus (+) icon to add modules to begin building your report.
The pin icon in the top right will keep this open when pressed.

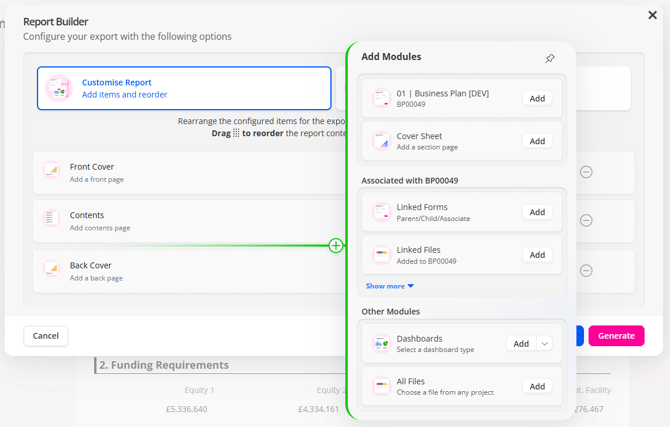
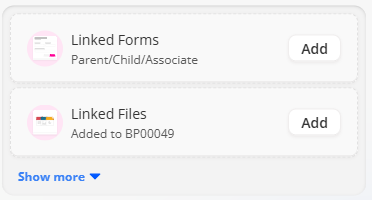
4. When selecting linked files or linked forms, you will be taken to an additional screen where you can choose the files or forms to add to the report when pressing the save button.
Click the 'Show more' option to open other associated items such as notes, audit, workflow and guidance.

5. Click 'Add' to select a dashboard that belongs to the project you are in. You will be taken to a screen where you can pick from a list of available dashboards contextual to that project.
To pull through dashboards from other Projects, Groups or Global dashboards, click the options available from the drop down. You will be taken to another screen where you can select the dashboard and available projects, then apply filters or pick from different date snapshots.

6. Select any form by clicking 'Add' to open a list of all forms available. Search for a form name then click Select to open a list of all tickets available.
Apply filters in this list and choose between a list view or individual ticket view to add to the report.

7. Choose files from any project by clicking 'Add' to open a list of all files available. Search, apply filters or different views to tailor what is shown on screen and display as a list of items or as a converted PDF attachment.
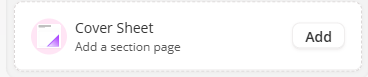
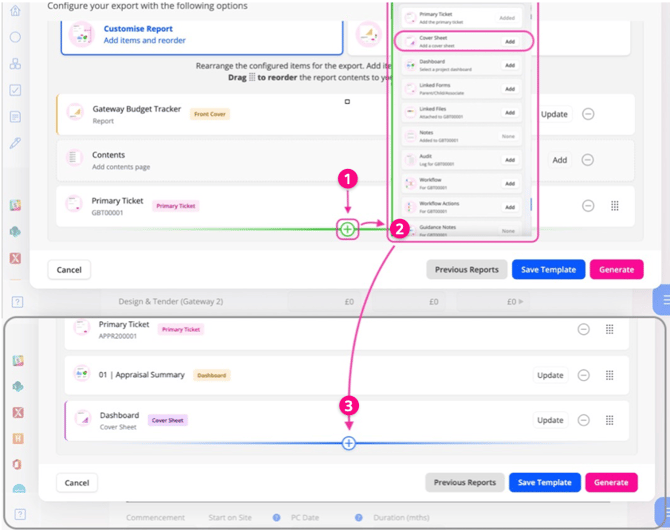
8. Create separate sections within your report by selecting Cover Sheet, where you can customise text, style and images.

After creating the Cover Sheet, use the blue plus icon underneath to add new items to the Section, or drag and drop existing items into this area to build a fully customised Report.

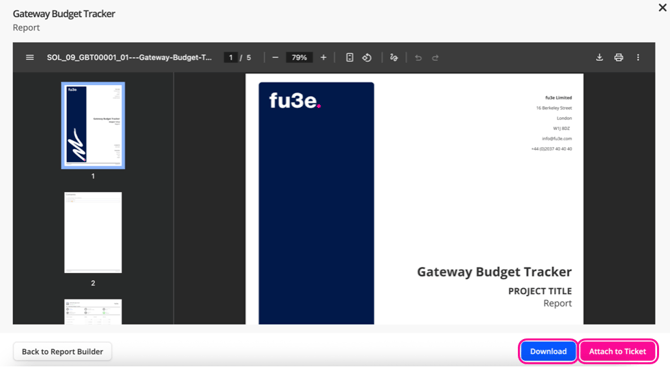
9. Click Generate to create a preview of the PDF. Please be patient with larger reports.

10. You can either Download your Report or Attach the PDF copy to the main Ticket.

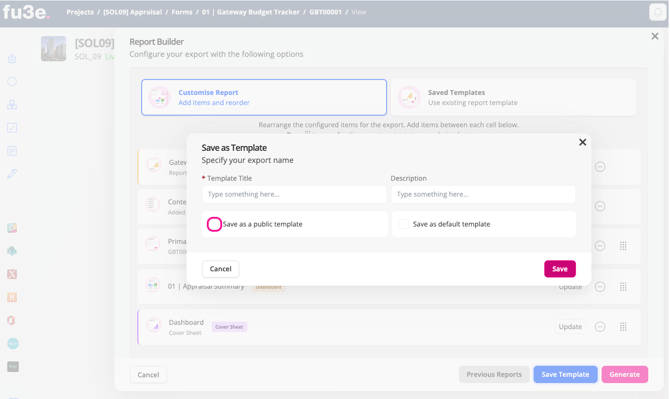
11. Once you close the previous screen you can then Save as a Template to store the configuration set up to streamline for Reporting for next time.

12. Select the Public checkbox to make this Report template accessible to your team.

Please note, for larger reports you will get a notification warning that the report may take longer to export when it either exceeds 200 pages or 500mb.
The Report Export limit is 1,000 pages or 1.5gb.