1. Hover over the left panel and click on the Organisations icon which sits under the Administration section.

From this list, you can see the numbers of users assigned, the environment access permitted, and any groups, projects or tags assigned.
Note: Other information is available such as the status, created date and ID. Click the blue column headers to sort by ascending or descending order.
You can also customise how you want to display this information from the View cogwheel to re-arrange the columns, apply a sort order and filters.

3. Create or Update an Organisation
To Create: Click the "Create Organisation" button on the top right of the screen.

To Update: Use the three-dot menu next to the Organisation and select "Update" or simply click into the row.

A new screen will pop up with three options: 1 Manage Organisation, 2 Assign Users and 3 Group/Project Permissions.
Important to note: Any permissions assigned to an organisation will apply to all users that belong to that organisation.
- Enter the organisation name, type and select the "Active" checkbox.
- Environment access provides users with site wide permissions, that are not linked to individual projects or project groups. This includes permissions such as global dashboard visibility.
- Click Save & Create to then assign Users, Groups or Projects.
- Use the dropdown to select users to add to the organisation.
Tip: Hold Ctrl to select multiple users.
In the dropdown, the bold headers are existing Organisations - click on the bold header to add all the users that sit under that group.
- Click Assign Users, then either Save & Close to finalise setup or proceed to assign Groups or Projects.
- Assign groups or projects to the organisation. All users within the organisation will gain access to the assigned groups/projects.
- Tags can be assigned on this screen, which are used as custom labels that are associated to an organisation. They’re often created to separate different roles within a business or project, such as Consultant, Engineer, Architect or Surveyor.
- Select the appropriate Permission Group from the dropdown and click Assign. The permissions will appear in a table below.
Important: Click Save & Close to apply changes.
- Search for projects, assign custom tags, or remove any assigned projects/groups as needed.
- Tags are custom labels are created to distinguish specific project roles within an organisation, such as Project Manager, Investor, Client, or Supplier.
- Click this icon to open a pop up that shows the different options available for permissions
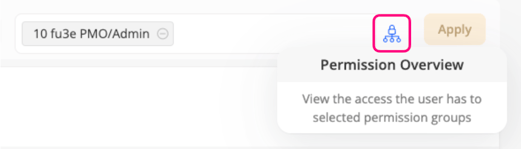
- If the icon is next to a project, it will display the specific permissions for that project or group.
-
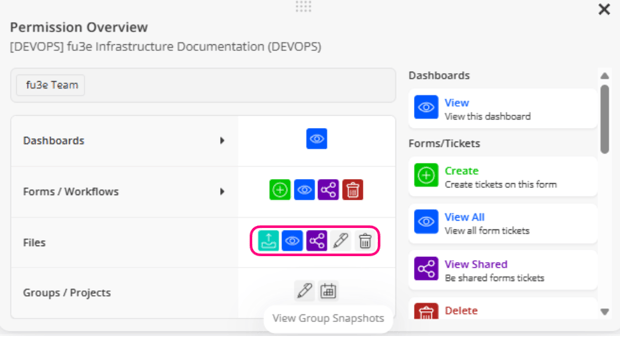
This key indicates the various levels of access—such as view, create, edit, or delete—across dashboards, forms, files, and projects.
Any icons shown in grey are inactive and do not apply
-
In the example above, the ‘fu3e Team’ is the Permission Group, and the users within this group have permission to view dashboards.
Click on the arrow to expand the dashboard section and display the relevant dashboards.
- The example also shows that this Permission Group allows users to upload, view, and share files, but does not grant permission to edit or delete files.
FAQs
Q What are permission groups?
This is a group of permissions which have been setup to align to your business requirements.
Q What are Tags?
Custom labels created to separate an organisation into specific project roles, such as Project Manager, Investor, Client or Supplier. This label or tag is shown when sharing files to the entire organisation.
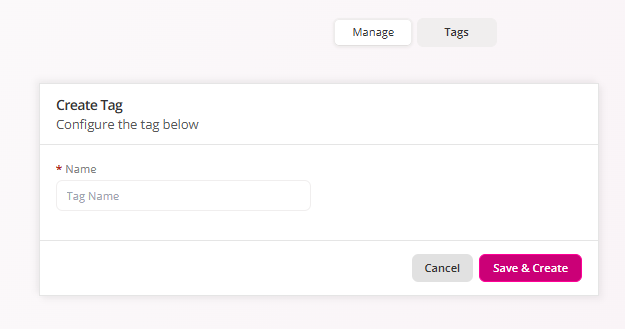
Q How do I create a Tag?
From the left slide out panel, click Organisation icon to open the page where you can manage the list of organisations. At the top of the screen there is a Tag option, clicking this will take you to the screen for all the tags where you can click Create Tag to add more custom labels.